
The best gift wrapping tips for every present
In short:
- Good measurements and the use of quality materials ensure professional and neat gift wrapping.
- Avoiding excessive tape and applying correct folding techniques result in a sleek appearance, regardless of the gift's shape.
Gift wrapping is the art of combining the right materials, accurate measuring, and clever folding techniques for a polished result. With good gift wrapping tips, you save paper, tape, and time. The three pillars of professional wrapping are quality paper on a roll, double-sided tape, and sharp scissors. Anyone who has these three in order will immediately achieve a boutique look, regardless of the gift. This article covers everything from material selection to step-by-step techniques, tricky shapes, and the most common mistakes.
What materials do you need for professional wrapping?
The right tools make the difference between a messy and a professional result. Double-sided tape and sharp scissors are the secret to a boutique look. If you work with regular sellotape, you will always see visible glue lines and frayed edges. This can be avoided.
The basic necessities for every wrapping session:
- Gift wrap on a roll. Paper on a roll provides a neater and more professional finish than folded sheets. Creases in the paper will be visible on the gift and give a cheap impression.
- Double-sided tape. Invisible attachment without glue lines. The gift also opens easier for the recipient.
- Precision scissors. Sharp scissors cut straight and prevent fraying. Ordinary kitchen scissors will cause the paper to skew.
- Ruler or bone folder. For straight cutting lines and crisp folds.
- Ribbon, organza ribbon, or curling ribbon. Gives the gift character and completes the finishing touch.
- Decorations. Think of bows, curl pins, or tissue paper for extra depth.
Pro-tip: Create a dedicated wrapping kit in a box or drawer. A special wrapping kit with scissors, tape, and ribbon prevents wasted time and reduces frustration. You'll find everything immediately and work faster.
A handy overview of the most used materials and their function:
| Material | Function |
|---|---|
| Gift wrap on a roll | Clean lines, no distracting creases |
| Double-sided tape | Invisible attachment, neat seams |
| Precision scissors | Straight cuts, no fraying |
| Organza ribbon | Luxurious appearance, sturdy bows |
| Curling ribbon | Quick decoration, playful effect |
| Tissue paper | Filling and soft finish in bags or boxes |
How do you precisely measure and cut gift wrap?
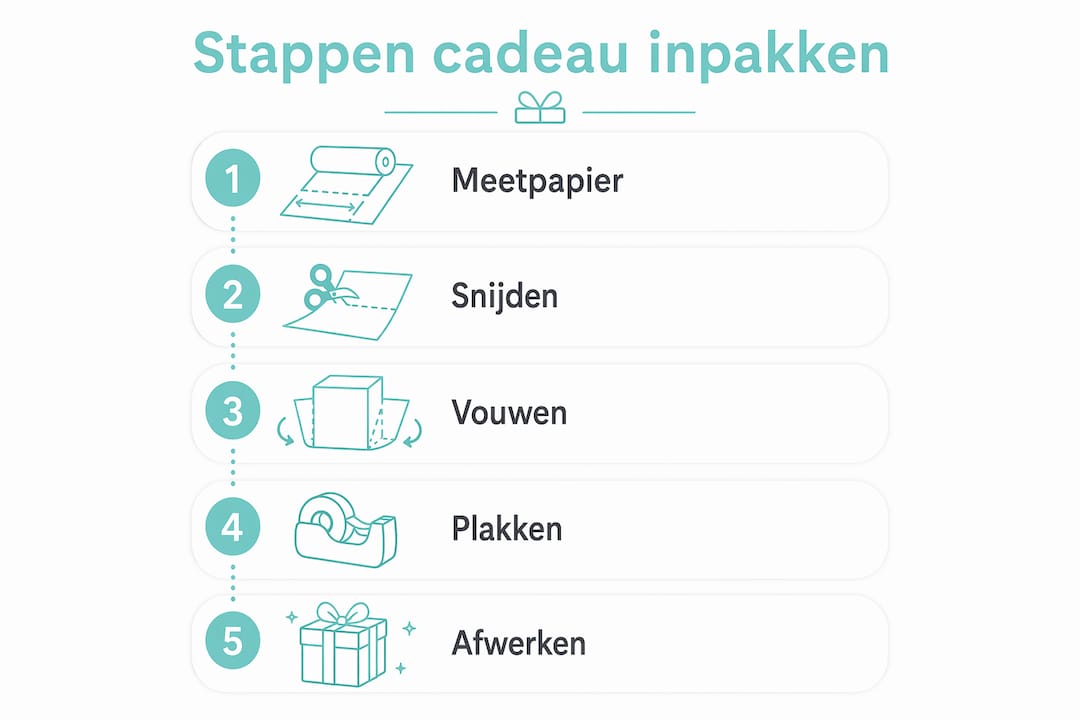
The biggest mistake in gift wrapping is estimating how much paper you need. Measuring prevents messy folds and excessive tape usage. Those who guess always cut too little or too much. Both situations lead to an unprofessional result.
Follow these steps for perfect dimensions:
- Place the gift on the paper. Roll out the paper on a flat surface and place the gift face down on it.
- Measure the overhang. The paper should extend at least 5 cm beyond each edge of the gift. This provides enough room for neat folds without excessive paper.
- Check the width. Wrap the paper around the gift and add twice the height of the gift to the width. Add 3–5 cm for the overlap.
- Cut along a straight line. Use a ruler or first fold the paper tightly to mark a straight cutting line. Then cut in one smooth motion.
- Test for irregular shapes. Place the gift on the corner of the paper for round or irregular objects. This uses less paper and results in smaller folds.
Pro-tip: Fold the paper in half along the cutting line before cutting. The fold line provides a perfect straight guide, even without a ruler. Also check out Kadopapier's tips for accurate measuring for more details.
For square gifts, the standard method works best. Rectangular boxes require extra attention at the short sides. Round objects are the trickiest and require a different approach, which will be discussed later in this article.
Which techniques ensure neat gift wrapping?
Professional wrapping classes sometimes cost around £147, featuring techniques like the kimono and fan-fold methods. These techniques can also be applied at home with some practice. The difference lies in the details: corners, seams, and the finishing touch.
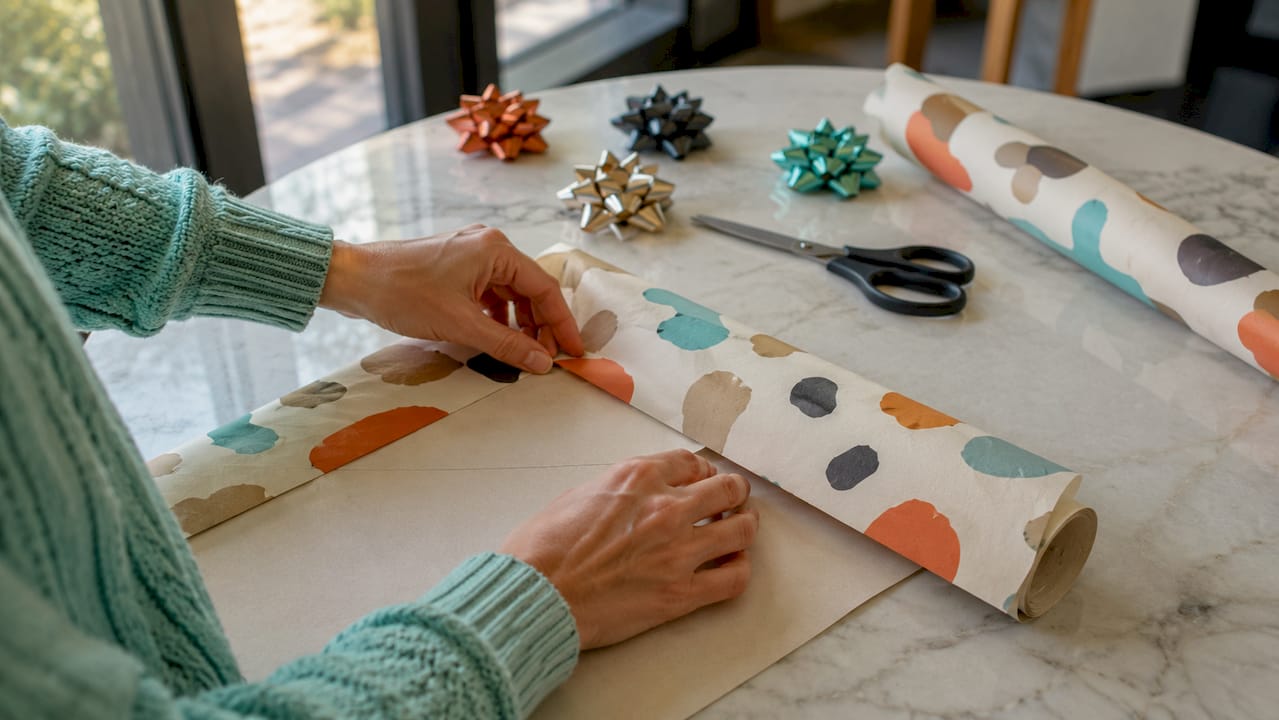
Step by step to a neat result:
- Place the gift upside down on the paper. The bottom of the gift will face up. This way, all seams are hidden on the underside.
- Fold the long side first. Pull the paper taut over the gift and secure it with double-sided tape. Ensure there are no air bubbles in the paper.
- Fold the corners neatly. Press the paper flat inwards on the short sides. Fold the triangular flaps tightly upwards and tape them down.
- Use the kimono technique for extra neatness. Fold the sides diagonally inwards, like a kimono collar. This provides a clean, flat finish without bulky corners.
- Add a bow or ribbon as a finishing touch. Tie the ribbon tightly around the gift and make a bow. Use curling ribbon for a playful effect or organza ribbon for a luxurious look.
Comparison of the most common folding methods:
| Technique | Suitable for | Difficulty |
|---|---|---|
| Standard folding method | Rectangular boxes | Easy |
| Kimono technique | Flat or square boxes | Medium |
| Fan fold | Cylinders and round shapes | Advanced |
| Diagonal wrapping | Square boxes | Easy |
| Furoshiki | Irregular and soft shapes | Medium |
Pro-tip: Always work on a hard, flat surface. A soft surface like a carpet makes crisp folds impossible. A table or cutting mat yields the best results.
The finishing touch makes all the difference. A neatly wrapped gift with a sloppy bow loses points. Take your time with the ribbon. Use decorative curl pins or a pre-made bow for an instant professional effect.
How do you wrap tricky gifts like bottles or round objects?
Awkward shapes are the biggest challenge in gift wrapping. Bottles, round objects, and soft clothing don't fit the standard rectangular method. The solution lies in alternative techniques and clever material choices.
The best approach per type of tricky gift:
- Bottles. Roll the bottle diagonally in the paper. Start at a corner and roll tightly. Twist the bottom closed like a candy wrapper and tie off the top part with ribbon. Tissue paper in a gift bag also works excellently for bottles.
- Round objects. Use foil or tissue paper as the first layer. Wrap the object tightly and tie the top with a ribbon. The result resembles a candy.
- Clothing and soft items. Fold the clothing neatly and place it in a box. Fill any empty space with tissue paper. Then wrap the box normally. This maintains the rectangular shape and keeps the folds neat.
- Small loose items. Group them in a small box or gift bag. Add tissue paper or crepe paper for a neat presentation.
Furoshiki is a Japanese fabric technique that is durable and elegant for awkward gift shapes, without plastic tape. Furoshiki is an eco-friendly and stylish method for irregular shapes. You use a piece of fabric that you wrap around the gift and tie.
Pro-tip: For wrapping without tape, use the Furoshiki method or wrap the gift in tissue paper and tie it with ribbon. No tape needed, and the result is stylish.
For clusters of small gifts, a large box with tissue paper works best. Place the items on a bed of tissue paper and fill the space. Then wrap the box as a single unit. This looks neater than wrapping each item separately.
Which mistakes should you avoid when gift wrapping?
The most common gift wrapping mistakes are immediately avoidable with the right approach. Too much tape makes it difficult for recipients to open and reduces the professional appearance. Less tape, used in the right places, always yields a better result.
The most common mistakes at a glance:
- Using too much tape. Three to four pieces of double-sided tape are enough for a standard gift. More tape makes opening difficult and looks messy.
- Incorrectly measuring paper. Too little paper leads to large, ugly folds. Too much paper creates bulky, awkward corners. Always measure, never guess.
- Using paper in folded sheets. Creases in the paper will be visible on the gift. Always choose paper on a roll for a neat result.
- Working with dull scissors. Dull scissors will skew the paper and create frayed edges. Replace or sharpen your scissors regularly.
- Wrapping under time pressure. Wrapping quality declines after 12 gifts. Work in short sessions to stay fresh and avoid mistakes.
- Not having a dedicated wrapping station. Working on the couch or floor leads to crooked folds and lost materials. A table with ample space is the minimum requirement.
Time pressure is an underestimated factor. Those who are tired or rushed make more mistakes and waste more material. Plan wrapping sessions for a calm moment. Have all materials ready before you start. This way you work more efficiently and the result is better.
Key insights
The best gift wrapping comes from measuring, the right materials, and targeted techniques, not from more tape or more paper.
| Point | Details |
|---|---|
| Always measure the paper | Use the 5 cm overhang rule on each side for neat folds without waste. |
| Choose paper on a roll | Paper on a roll gives cleaner lines than folded sheets and looks more professional. |
| Use double-sided tape | Invisible attachment gives a boutique look and makes opening easier. |
| Apply Furoshiki for tricky shapes | The Japanese fabric technique works for round and soft gifts without tape or paper. |
| Work in short sessions | Quality declines after 12 gifts; plan breaks to stay fresh and accurate. |
My honest take on gift wrapping
Most people underestimate the difference between good and bad wrapping. Not because of talent, but because of preparation. I've noticed that those who set up a dedicated wrapping station with all materials at hand immediately produce better work. Not because they've become better, but because they no longer have to search for scissors or tape while the paper shifts.
What I also see: people use too much tape to compensate for poorly measured paper. That backfires. Two pieces of double-sided tape in the right place are always better than six pieces of regular sellotape scattered across the gift. Technique triumphs over quantity.
Creative flair doesn't have to be complicated. A piece of organza ribbon in a contrasting color, a small twig, or a handwritten label does more than an excess of bows and decorations. Less is more, especially with gift wrapping. Kadopapier's festive wrapping ideas show how you can achieve a special result with simple means.
My favorite technique remains the diagonal method for square boxes. Less paper, crisp corners, and always a surprising result. Try it once and you'll never do it any other way.
— M
Everything for a perfect gift at Kadopapier
Good materials make the difference between an ordinary and a professionally wrapped gift. Kadopapier offers a wide range for every occasion, from holidays to birthdays. The organza Christmas ribbon collection includes luxurious glitter, wired, and classic variants that instantly give any gift a festive look. In addition to organza ribbon, Kadopapier also offers curling ribbon, decorative elastic, and curl pins for the finishing touch. All materials are available in wholesale format, so you always have enough for multiple gifts. View the full range on kadopapier.net and find the materials that match your style and occasion.
Frequently asked questions
How much paper do I need for one gift?
The paper should extend at least 5 cm beyond each edge of the gift. Always measure next to the gift instead of estimating to avoid waste.
What is the difference between double-sided tape and regular sellotape?
Double-sided tape is invisible after wrapping and provides a professional, neat finish. Regular sellotape leaves visible glue lines and makes the gift harder to open.
How do I wrap a bottle neatly?
Roll the bottle diagonally in gift wrap and twist the bottom closed like a candy wrapper. Tie off the top with ribbon, or use a gift bag with tissue paper as an alternative.
What is Furoshiki and when do you use it?
Furoshiki is a Japanese fabric technique where you wrap a piece of fabric around the gift and tie it. It works well for round, soft, or irregular shapes and is a sustainable alternative to paper and tape.
How do I prevent tears in the gift wrap?
Always use sharp scissors and choose paper on a roll instead of folded sheets. Cut in one smooth motion along a straight line or fold mark.