
How to always measure wrapping paper correctly: tips and tricks
TL;DR:
- Accurate gift wrap measurement prevents shortages or excess, leading to a neater result.
- Simple tools like a tape measure, ruler, and cutter allow for precise measurement and minimize waste.
- By measuring generously and being creative with scraps, you achieve professional and sustainable wrapping results.
You have everything ready: the gift, the paper, the ribbon. Then you cut, you fold, and the paper is just a centimeter short. Or you have so much left over that you could have wrapped a second gift with it. This is one of the most recognizable frustrations when wrapping gifts. Measuring correctly seems simple, but in practice, it requires a consistent approach. In this article, you'll learn step-by-step how to always measure gift wrap accurately, which tools help, and how to smartly reduce waste.
Table of Contents
- What do you need for accurate gift wrap measurement?
- Step-by-step instructions: How do you measure gift wrap?
- Smarter measuring: minimizing scraps and waste
- Common mistakes and how to easily avoid them
- Our view: measuring with daring and an eye for detail
- Complete the look with the right ribbon and decoration
- Frequently Asked Questions
Key Insights
| Point | Details |
|---|---|
| Always sufficient margin | Add 15-20 percent extra gift wrap to your measurements for neat folds. |
| Use a cutter | A paper cutter or ruler ensures a clean, non-fraying edge. |
| Place gift diagonally | By placing your gift diagonally, you reduce scraps and use paper more efficiently. |
| Pay attention to protruding parts | Measure to the highest point of the gift to prevent shortages. |
What do you need for accurate gift wrap measurement?
Now that you know why accurate measuring is so important, let's first explain what you need to prepare before you start.
You don't need expensive tools to measure gift wrap accurately. However, you will need some basic items that you probably already have at home. Make sure everything is at hand before you begin. This saves you from running around the house halfway through wrapping.
You will need at least the following materials:
- Tape measure or ruler for measuring the gift and marking the cutting line on the paper
- Pencil or chalk marker to mark the cutting line without seeing through the paper
- Good scissors with a long blade for clean, straight cuts
- Gift wrap on a roll or sheet, sufficient length for the gift in question
- Flat and sturdy work surface, such as a large table, to prevent crooked cutting
The work surface is often underestimated. On a soft or uneven surface, the paper warps and you cut less straight. A kitchen table or a piece of hardboard on the floor works fine.
An additional tool that significantly improves both measuring and cutting is a cutting tool or gift wrap cutter. To cut neatly and prevent fraying, it helps to use such a cutting tool instead of just scissors. A tube with a built-in blade provides a perfectly straight line and prevents the typical nicks and tears you can get with ordinary scissors. This immediately shows the difference in finish.
Below is an overview of the most commonly used tools, sorted by utility:
| Tool | Utility | Difficulty Level |
|---|---|---|
| Tape measure | Measuring gifts and paper | Easy |
| Ruler | Drawing straight cutting lines | Easy |
| Scissors | Cutting paper | Easy |
| Cutter/Guide | Clean, straight cut | Medium |
| Cutting mat | Protects the work surface | Medium |
| Pencil/Chalk marker | Marking cutting line | Easy |
With this basic kit, you have everything you need for neat and precise work. Do you want to know how to fold the paper neatly afterwards? Then check out these tips on folding gift wrap, so you also handle the finishing touches well.
Step-by-step instructions: How do you measure gift wrap?
With your materials within reach, you can now begin the actual measuring. Follow these steps for every gift, whether square, rectangular, or round.
Measuring gift wrap goes wrong when people only measure the exterior of a gift and forget that the paper also needs to cover all sides. Here's the exact method:
- Measure the length of the gift. Place the gift flat and measure the longest side from left to right. Write down this number.
- Measure the width. This is the shorter side, from front to back. Write this down too.
- Measure the height. This is how thick or tall the gift is. This number is crucial and is most often forgotten.
- Calculate the required paper length. Use the formula: gift length + (2 x height) + at least 4 centimeters extra for the folds on both sides.
- Calculate the required paper width. Use: perimeter of the gift (width + height x 2) plus margin for folds.
- Add margin. Don't measure too tightly. 15 to 20 percent extra on top of the exact dimensions gives you enough room for neat folds and a professional finish without excessive waste.
- Mark the cutting line on the paper. Use a ruler and pencil for a straight line.
- Cut along the drawn line. Use a gift wrap cutter or scissors with a ruler as a guide.
For round gifts, such as bottles or balls, the approach is slightly different. For a bottle, you measure the height plus some extra for the top, and the circumference of the wide side plus margin for folds at the top and bottom. For a ball, you use the diameter (the width from front to back through the middle) multiplied by two as a guideline for both the length and width of the paper. Then add generously extra, as wrapping a ball requires a lot of paper for the sides.
Pro-tip: before measuring, place the gift on the back of the gift wrap (the white or lighter inside) and draw a line along all four sides with a pencil. You'll immediately see how much space you have and whether your margin is sufficient, without having to calculate.
The following comparison shows how much paper you need for common gift sizes:
| Gift Size | Gift Dimensions | Recommended Paper Size |
|---|---|---|
| Small (e.g., jewelry box) | 10 x 8 x 3 cm | 30 x 25 cm |
| Medium (book) | 22 x 15 x 3 cm | 55 x 40 cm |
| Large (shoe box) | 35 x 22 x 12 cm | 85 x 65 cm |
| Bottle (wine) | 30 cm high, 20 cm circumference | 55 x 45 cm |
| Irregularly large | Variable | Measure to highest point + 25% extra |
For small gifts, there are separate considerations, such as the choice of bags or a special wrapping technique. Read more about wrapping small gifts for specific tips per size. And if you want to speed up the entire wrapping process? Then this step-by-step plan for quick and neat wrapping will help you further.
Smarter measuring: minimizing scraps and waste
Besides working neatly, it's also nice not to unnecessarily waste too much paper. With these clever tricks, you'll get more out of your roll of gift wrap.
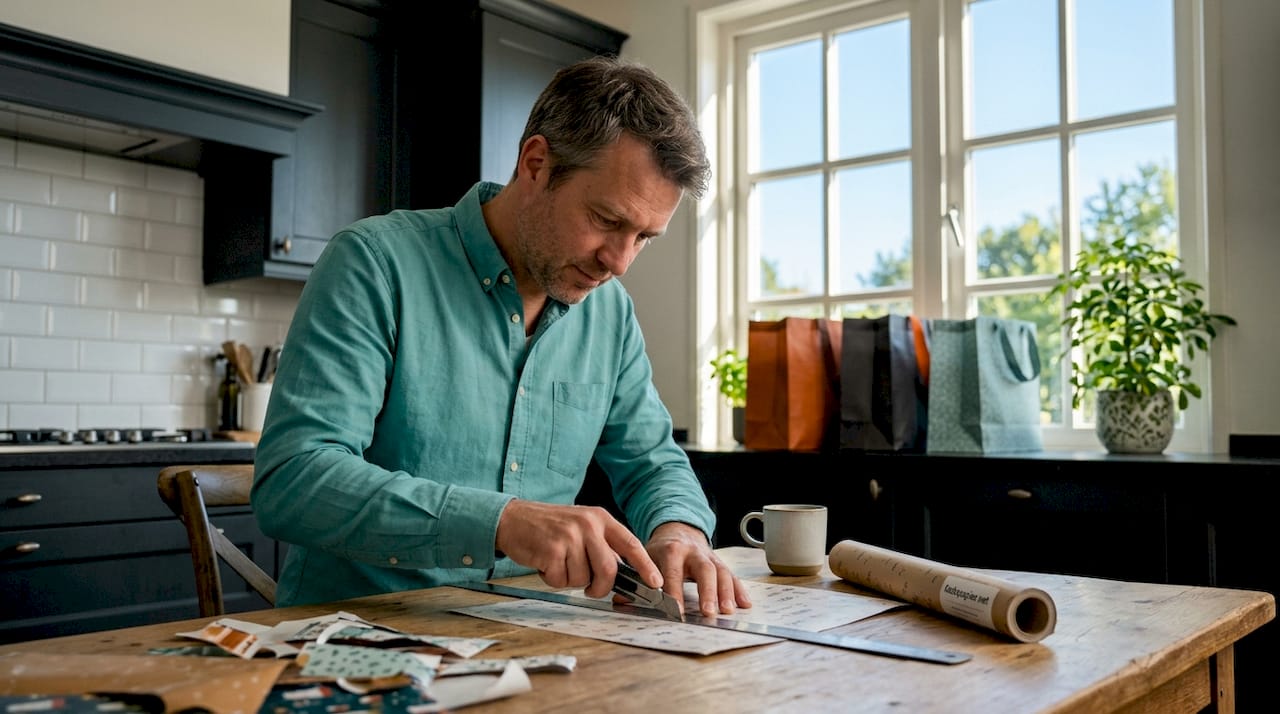
Waste almost always occurs when you place the gift straight on the paper, parallel to the edges. That sounds logical, but with rectangular gifts, it leads to significant corner scraps. You then cut away and discard those large triangular pieces.
There's a better approach: placing diagonally saves paper. By placing a rectangular gift diagonally, meaning at an angle on the paper, you utilize the available diagonal (the longest line from corner to corner) of the sheet. This results in significantly fewer leftover strips and at the same time creates a surprisingly neat fold if you execute the technique correctly. It takes some practice, but the result is both more efficient and visually interesting.
More tips for smart paper roll management:
- Plan large gifts first. Cut the largest piece from the roll for the largest gift. Scraps can then be used for smaller gifts.
- Use leftover strips as decoration. Narrow strips of gift wrap can be rolled into rosettes or spirals for decoration on top of the gift.
- Scraps as filler material. Shred scraps finely and use them as protective filler material in a gift box or gift bag.
- Store larger scraps separately. A piece measuring 20 by 20 centimeters is perfect for small boxes or jewelry. Don't throw them away.
- Pay attention to the pattern. Ensure that prints and motifs align at the same height on all sides. This requires a little more paper, but the result immediately looks more professional.
Pro-tip: after use, roll up the paper tightly and secure it with an elastic band. Curled or unrolled paper rolls are harder to cut straight and often result in a crooked cut. A neat roll is also easier to store.
Those who regularly wrap gifts also benefit from some creative thinking in their packaging choices. Sometimes an alternative approach is simply more efficient. For more inspiration, check out these tips for original gift packaging or the DIY packaging tips for creative alternatives that also save paper.
Common mistakes and how to easily avoid them
Despite all good intentions, sometimes things go wrong when measuring. Do you recognize these mistakes? Below, you'll read how to prevent them in the future.
Most missteps in wrapping don't arise from sloppiness, but from a few common misconceptions that almost everyone makes. Once you recognize them, you'll automatically avoid them.
Mistake 1: measuring too tightly
The most common mistake is measuring the outer dimensions of the gift without accounting for the folds. A fold at the bottom of a box easily costs an extra 4 to 6 centimeters of paper per side. If you don't include that, you'll always come up short. Measuring with a margin is not a luxury; it's a necessity.
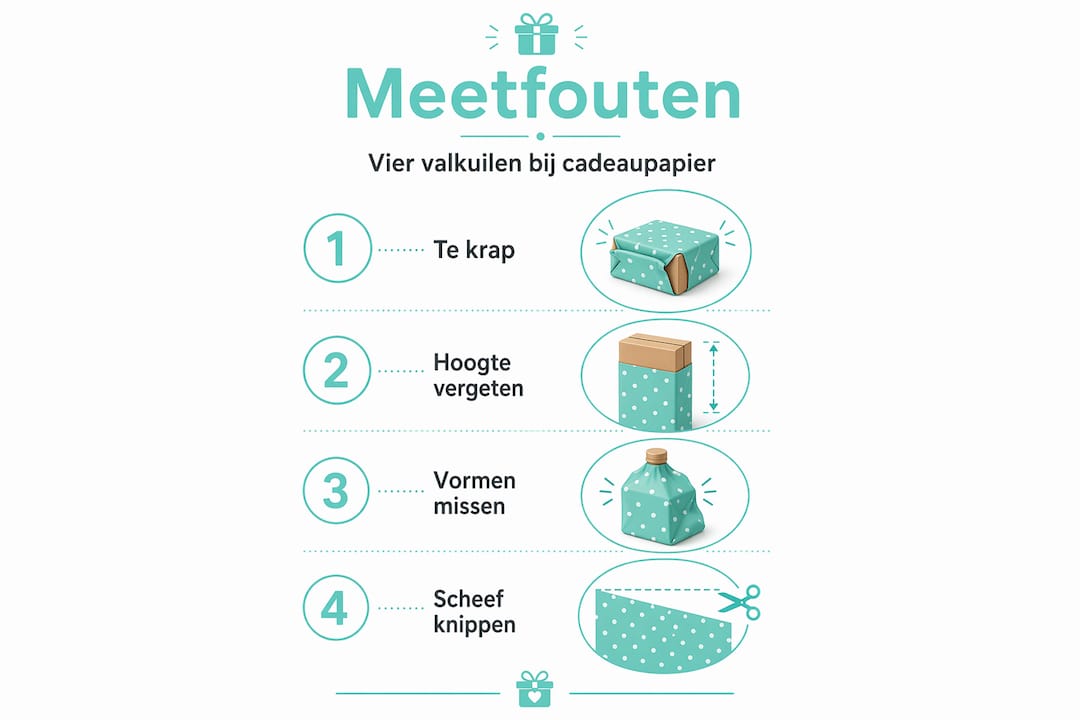
Mistake 2: forgetting the height
Imagine: you carefully measure the book, 22 by 15 centimeters. But the book is also 3 centimeters thick. Those 3 centimeters must be included twice in your calculation, because the paper goes over both the front and the back. Many people miscalculate this and are then surprised when folding it shut.
Mistake 3: underestimating irregular shapes
A toy with protruding wheels, a box with a handle, or a gift set with a border on top: all these protrusions require extra paper. Always measure to the highest point and then add an extra margin. A workaround if it turns out to be too tight is to cover the open space with an additional crossed piece of paper or a decorative ribbon.
Mistake 4: cutting crookedly
Anyone who cuts without a ruler or guide almost always cuts slightly crooked. That results in a frayed edge and an asymmetrical fold. Always use a straight guide when cutting. A long ruler or even a straight plank works great if you don't have a cutting tool at hand.
Mistake 5: not allowing enough workspace
On a small table or on the floor without enough space on all sides, the paper will shift during measuring and cutting. Make sure you have at least 30 centimeters of clear space around your workstation. This allows you to keep the paper flat and position the ruler correctly.
Good measuring is more than just calculating. It's about understanding the gift as a three-dimensional object. Anyone who learns to think in terms of length, width, and height, and consistently adds a margin, will always have enough paper.
Do you also want to deliver professional-looking gifts, such as corporate gifts? Then read how to professionally wrap corporate gifts for additional advice on presentation and scaled dimensions.
Our view: measuring with daring and an eye for detail
Finally, we summarize what we believe truly makes a difference in measuring and cutting gift wrap, beyond the standard tips.
There's a remarkable contrast in how people handle gift wrap. On the one hand, there are those who use so much paper that the gift looks more like a crumpled mess than a package. On the other hand, there are the "tight-measurers," people who are so afraid of waste that they measure every centimeter three times and still end up short.
Both extremes lead to an unsatisfactory result.
What we have seen after years of experience with wrapping paper and packaging materials is that the best results come from people who consciously measure generously and are consciously creative with scraps. Measuring with daring does not mean measuring carelessly. It does not mean being stingy if you need an extra 5 centimeters for a neat corner fold. That 5 centimeters makes the difference between a messy and a neat final result.
At the same time, we strongly believe that scraps are not waste. They are raw material for decorations, small extras for another gift, or filler material in a gift bag. Anyone who consistently does this hardly wastes any paper in practice, even if they always measure with a generous margin.
There's also a technical aspect that remains underexposed: the quality of the paper itself plays a role in how well the measuring turns out. Thin, cheap paper tears more easily when folding and tolerates a double layer at the corners less well. Sturdier paper provides more room to create neat triangular corners. Those who invest in good material need less paper per gift because things go wrong less often.
Finally: technical perfection is a means, not an end. A gift that is not wrapped perfectly symmetrically but is made with care and beautiful materials always looks better than a mechanically wrapped gift without character. Combine the measuring precision from this article with the creative tips on perfect folding, and you have an approach that always works, for every gift and every occasion.
Complete the look with the right ribbon and decoration
Now that your paper is precisely and efficiently measured, give your gift the finishing touch with the right ribbon or decoration.
A perfectly wrapped gift also deserves an appropriate finish. The ribbon you choose largely determines the overall look. For festive occasions such as Christmas or Sinterklaas, organza Christmas ribbon is excellent: it is airy, shiny and gives a festive effect without overdoing it. For an elegant and rich look, choose emerald curling ribbon, which you can easily curl for a festive effect. For a modern, sleek style, decorative elastic bands are a smart choice: quickly applied, reusable and available in many colors. This way, you turn every well-measured package into a complete gift.
Frequently asked questions
How much extra paper should I allow when measuring?
Always allow 15 to 20 percent extra on the exact dimensions for neat folds and a professional finish. This prevents cuts that are too tight without excessive waste.
What tools are useful for measuring and cutting gift wrap?
A tape measure, ruler, and gift wrap cutter ensure the best result. The cutter provides a perfectly straight line and prevents fraying and nicks on the edge.
What if my gift has an irregular shape?
Always measure to the highest point of the gift and allow extra margin for folds or covering tricky corners. Cheap corrections afterward look sloppy; generous measurement beforehand is always better.
Does placing the gift diagonally on the paper help?
Yes, placing it diagonally saves material and results in fewer leftover corners, especially with rectangular gifts. It takes some practice, but it's an effective technique for those who want to consciously waste less.