
Making Paper Flowers: Complete Guide for Beginners
TL;DR:
- Paper flowers are a sustainable and versatile alternative to real flowers.
- Various techniques, such as accordion flowers and origami, are suitable for different skill levels.
- They creatively and cost-effectively decorate parties, gift wrapping, and interiors.
Real flowers are beautiful, but after a week, they look wilted. Making paper flowers yourself is a creative alternative that doesn't wilt, costs almost nothing, and is endlessly customizable. Whether you want to decorate your living room, personalize a gift, or create a festive atmosphere for a party: paper flowers fit everywhere. In this article, you will learn what materials you need, how to make a flower step by step, what techniques are available, how to avoid common mistakes, and how to beautifully present your creations.
Table of Contents
- What do you need for paper flowers?
- Basic Steps: How to make simple paper flowers
- Alternative Techniques and Creative Variations
- Common Mistakes and Useful Solutions
- Your paper flower as decoration or gift: tips and finishing
- Our Experience: Why Paper Flowers are a Must-Have
- Buy Materials and Inspiration for Your Paper Flowers
- Frequently Asked Questions about Making Paper Flowers
Key Insights
| Point | Details |
|---|---|
| Anyone can start | With basic necessities and simple steps, making paper flowers is achievable for everyone. |
| Different techniques | Combine folding, cutting, rolling, and origami for endless variations and shapes. |
| Avoid beginner's mistakes | Use suitable paper, secure fastening, and don't be afraid to experiment. |
| Creative applications | Paper flowers are perfect as decoration or a unique gift accent. |
What do you need for paper flowers?
Before you begin, it's helpful to have everything ready. You don't need expensive materials. The basics are simple, and you probably already have many of them at home.
Basic materials:
- Paper (see below for which types work best)
- Scissors or utility knife
- Glue or hot glue gun
- Stapler
- Floral wire or craft wire for the stem
- Ribbon or string for finishing
Which paper is best to use?
| Paper type | Suitable for | Difficulty |
|---|---|---|
| Crepe paper | Soft, realistic flowers | Easy |
| Tissue paper | Light, delicate flowers | Easy |
| Colored paper | Simple, colorful flowers | Easy |
| Cardstock | Sturdy, durable flowers | Medium |
| Origami paper | Sharp, geometric flowers | Advanced |
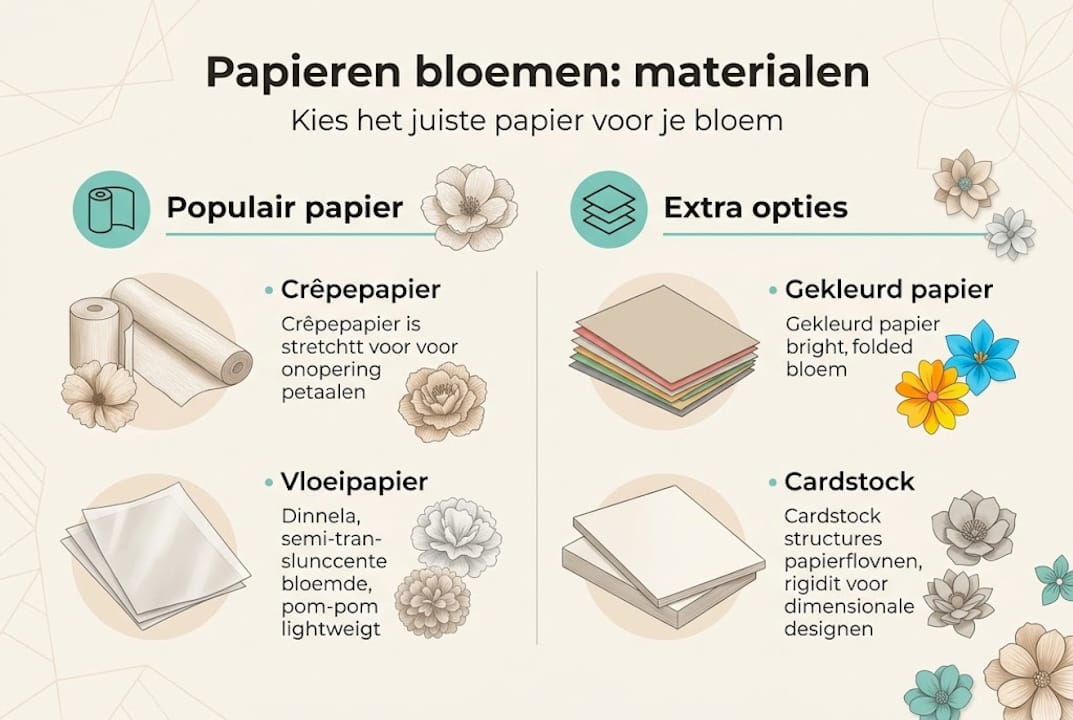
Folding and stapling colored paper or crepe paper are the most common methods for simple paper flowers. Crepe paper has slight stretchability, allowing petals to achieve a beautiful rounded shape. Tissue paper is thinner and gives a transparent, airy effect. Also, explore the possibilities of creative uses for tissue paper for more ideas with this versatile material.
Optional extras for finishing:
- Glitter or glitter spray
- Stickers or washi tape
- Beads or pearls
- Decorative ribbon
- Paint or markers to add details
Want to know how to fold tissue paper correctly? Read more about folding tissue paper for handy techniques.
Pro-tip: Start with crepe paper if you are making paper flowers for the first time. It's inexpensive, easy to find, and forgiving of small mistakes because it stretches slightly when folded.
You don't have to buy everything at once. Start with paper, scissors, and a hot glue gun. That's enough for your first flower.
Basic Steps: How to make simple paper flowers
Now that you have gathered all your materials, you can get started. The accordion technique is the most accessible method for beginners. You will have a beautiful flower within twenty minutes.
Step-by-step: crepe paper accordion flower
- Cut the crepe paper into rectangular strips approximately 30 by 15 centimeters. Use multiple layers for a fuller flower.
- Stack four to six strips on top of each other. Make sure the edges are aligned.
- Fold the stack accordion-style: fold a small section up and down repeatedly, like a fan.
- Staple the middle firmly or tie wire around it.
- Cut the ends round or pointed, depending on the type of flower you want to make.
- Carefully pull the layers apart and fold them upwards towards the center.
- Shape the petals with your fingers. Gently push them up and apart.
For crepe paper flowers: stack squares, fold accordion-style, staple in the middle, cut round, unfold, and shape with a wire stem. This immediately gives a beautiful result, even if you've never made paper flowers before.
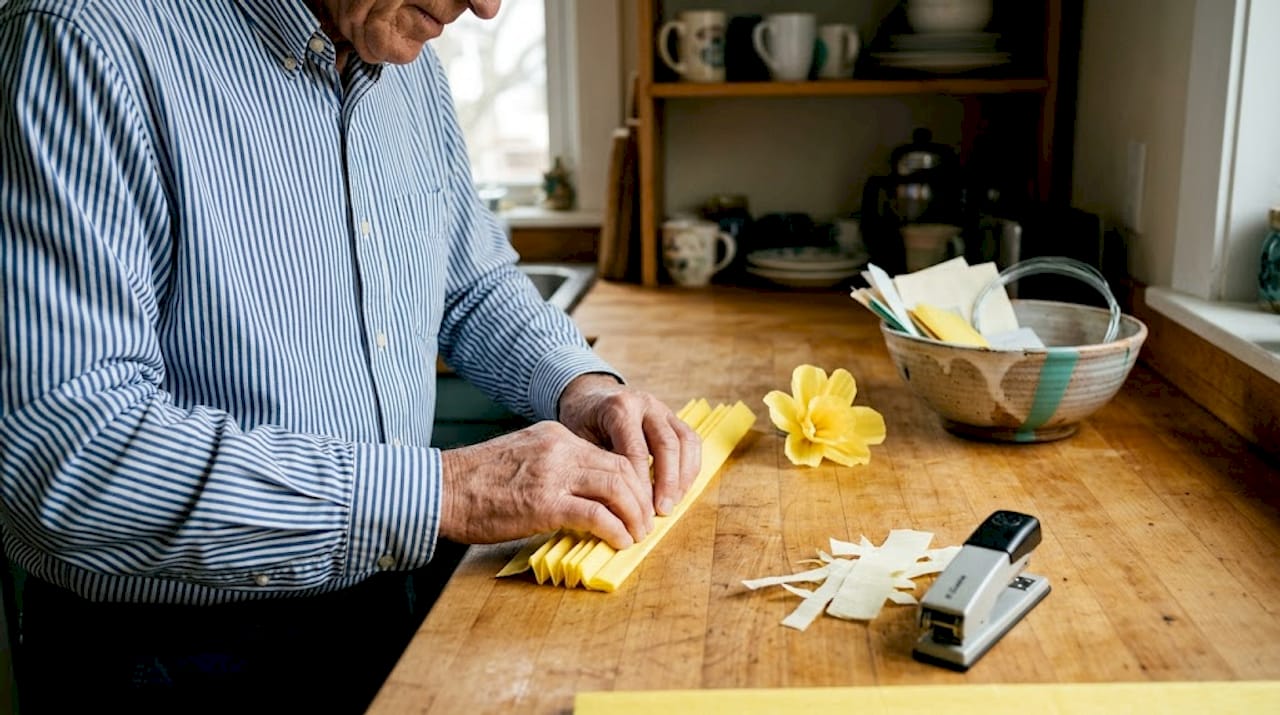
Comparison: accordion flower versus folded flower
| Method | Duration | Tools | Result |
|---|---|---|---|
| Accordion flower | 15 to 20 minutes | Scissors, stapler | Full, festive |
| Folded flower | 10 to 15 minutes | Scissors only | Simple, neat |
The accordion flower is ideal for table decoration or as an accent on a gift. The folded flower is quicker and works well if you want to make several at once. Use them together for festive gift wrapping.
Pro-tip: Use two or three colors of paper in one flower for a playful, colorful effect. Alternate the layers before folding.
The beauty of this method is that you see immediate results. No lengthy preparation, no complicated instructions. Just cut, fold, and unfold.
Alternative Techniques and Creative Variations
Once you've mastered the basics, you can enrich your creations with other techniques. There are several ways to make paper flowers, each with its own character and application possibilities.
Three popular techniques at a glance:
- Origami flower: Folding without glue or scissors. You work with a single sheet of paper and use only fold lines. This requires more practice, but the result is sleek and elegant. Origami folding without glue or scissors is a popular method for geometric flowers.
- Cardstock teardrop flower: Cut teardrop shapes from sturdy cardstock and roll them up with a pencil or skewer. Glue the rolls together to create a compact, three-dimensional flower. Ideal for original gift wrapping.
- Fan or sunflower: Use the accordion technique but make the strips wider and longer. Cut the ends to a point for a sunflower effect. Cut them round for a daisy.
When to choose which technique?
- Need quick results: choose the accordion technique
- No glue or scissors at hand: choose origami
- Sturdy flower for a bouquet or long-term use: choose cardstock
- Large size for wall decoration: choose the fan shape
Pro-tip: Combine techniques in one arrangement. A cardstock flower as a centerpiece with tissue paper accordion flowers around it adds depth and texture to your decoration.
For those who want to experiment further: check out the packaging techniques on Kadopapier.net for more creative ideas where paper is central. Each technique has its own charm. Try them all and discover which one best suits your style.
Common Mistakes and Useful Solutions
As with any creative project, there are pitfalls, but fortunately also simple solutions that will enhance your crafting pleasure. Here are the most common problems and how to solve them.
The four most common mistakes:
- Paper too stiff or too brittle: Cardstock is sometimes too thick to fold smoothly. In that case, use a bone folder or the back of a spoon to create sharp creases. Crepe paper tears easily if you pull too hard. Fold gently and with even pressure.
- Folds too tight or too loose: Too tight folds result in a flat, unnatural flower. Too loose folds won't hold their shape. You'll feel the right pressure after a few attempts. Practice first with inexpensive paper.
- Glue or staple in the wrong place: Don't staple the ends of the accordion, but the middle. A staple in the wrong place will cause the flower to be crooked or not open properly. Always check the position before stapling.
- Flower falls apart: This happens if the layers are not securely fastened. Use an extra staple or a drop of glue in the middle for added stability.
“Simple methods are ideal for beginners and quick decoration or gifts. Advanced techniques are better for durable bouquets.”
This also applies to choosing your tools. Start simple. A hot glue gun is handy, but a regular glue stick also works well for tissue paper and crepe paper. Also, check out the DIY packaging tips for more practical advice on craft projects.
Remember: an imperfect flower is not a failed flower. Small irregularities give handmade work character.
Your paper flower as decoration or gift: tips and finishing
After making them, you'll naturally want to present your flowers beautifully. The way you use them makes the difference between a nice craft project and a real eye-catcher.
Presentation tips:
- On a stem: Wrap floral wire around the base of the flower and cover the wire with green crepe paper. This creates a real stem that you can place in a vase.
- On a gift: Glue the flower directly onto the wrapping paper with a piece of double-sided tape. Combine with a bow or ribbon for a festive look.
- In a vase: Make several flowers in different sizes and colors. Arrange them together in a vase for a colorful, permanent decoration.
- As wall decoration: Make large flowers of 30 to 50 centimeters and attach them to the wall with adhesive strips. Perfect for a party or photo wall.
Finishing ideas:
- Spray the edges of the petals gold or silver with spray paint
- Add glitter to the inside of the flower
- Attach a pearl or button in the center as the heart
- Use colored ribbon to wrap the stem
For more inspiration on creative uses for tissue paper, you'll find many ideas that are also applicable to paper flowers. Want to look further for paper decoration inspiration? There are endless possibilities for incorporating paper into decorative projects.
Paper flowers are also perfect for seasonal decoration. Make pastel-colored flowers for spring, sunny yellow and orange flowers for summer, or deep red and burgundy flowers for autumn and winter.
Our Experience: Why Paper Flowers are a Must-Have
We see it time and again: hobbyists who make paper flowers for the first time are surprised by how quickly they achieve a beautiful result. No expensive materials, no special training. Just paper, scissors, and a little patience.
What we've learned: perfection is overrated. A flower with slightly uneven petals has more character than a machine-made version. That handmade aspect is precisely what makes paper flowers so special as a gift or decoration.
Paper flowers are also cost-effective. For the price of one bouquet of fresh flowers, you can make dozens of paper ones that will last for months. And they are adaptable to any theme, color, and season.
For retailers and creative entrepreneurs, paper flowers offer added value, as DIY tips for retailers show: they enhance the product experience without driving up costs. A personal touch that customers appreciate and remember.
Buy Materials and Inspiration for Your Paper Flowers
Ready to get started? At Kadopapier.net, you'll find everything you need for your paper flower project. For finishing your flowers, white curl pins are a beautiful addition that immediately gives your flower a festive touch. Combine them with red organza ribbon for an elegant stem or as an accent on a gift package. All materials can be easily ordered via all craft materials. Ordered Monday to Friday before 3:00 PM, shipped the same working day. Free shipping from 100 euros excl. VAT.
Frequently Asked Questions about Making Paper Flowers
What types of paper are most suitable for paper flowers?
Crepe paper, tissue paper, and colored paper are very suitable because they fold and shape well. Folding and stapling crepe paper is the most common method for simple flowers.
Can you make paper flowers without glue or a stapler?
Yes, with origami techniques, you can fold flowers without using glue or scissors. Origami folding without glue or scissors is an accessible method for geometric flowers.
How do I prevent my flower from falling apart?
Use sturdy paper and staple the layers securely in the middle. Folding and stapling in the center of crepe paper ensures maximum stability.
What are the applications for paper flowers?
They are suitable for home decoration, gift wrapping, parties, and as a personal accent on gifts. You can put them on a stem, attach them to a package, or place them in a vase.