
How to Fold Gift Bags: Simple Steps 2026
Wrapping gifts can be a challenge without the right techniques or materials. Many people struggle with finding the perfect gift bag or pay too much for ready-made options. Folding your own gift bags offers a creative, personal, and budget-friendly solution. In this guide, you will learn step-by-step how to make beautiful bags that perfectly match any gift using simple materials such as paper, glue, and a bone folder. You will discover practical techniques to adjust the size, use different types of paper, and finish your creations with a professional look.
Table of Contents
- What you need to fold gift bags
- Step-by-step instructions for folding gift bags
- Common mistakes and tips for the perfect gift bag
- Variations and creative ideas for gift bags
- Discover premium ribbons and accessories for your gift bags
- Frequently asked questions about folding gift bags
Key Points
| Point | Details |
|---|---|
| Simple instructions | Folding your own gift bags is accessible with clear step-by-step instructions and basic skills. |
| Minimal materials | Square paper, glue, and a bone folder are sufficient to achieve quick results. |
| Customizable size | Vary the paper size to create bags that perfectly fit your gift. |
| Sturdiness is crucial | Accurate folding and the correct paper thickness determine if your bag will remain sturdy enough. |
| Creative freedom | Experiment with recycled paper, decorations, and different folding styles for unique designs. |
What you need to fold gift bags
After the overview of key points, we'll dive into the specific supplies needed to get started. The good news is that you probably already have many materials at home. The method uses easily available materials such as paper, a template, a bone folder, and glue, making the project accessible to beginners. You don't need expensive tools or special skills.
Basic supplies include square or rectangular paper in the desired size, a template like a box or book to define the shape, a bone folder or dull knife for sharp creases, and glue or double-sided tape for the seams. Scissors are handy for cutting paper to size. Small clips or clothespins help hold the top, especially if you're using thinner paper.
The choice of paper significantly affects the end result. Thicker paper like cardstock or sturdy wrapping paper provides rigidity and carries heavier gifts better, but it's harder to fold and requires more pressure on the creases. Thinner paper like standard printer paper or decorative gift paper folds more easily and is ideal for light items, but it tears more easily with rough handling. Recycled paper such as old magazines, newspapers, or paper bags adds a vintage look and is environmentally friendly.
A bone folder, a flat plastic or bone tool, helps create crisp, sharp creases that give your bag a professional look. Don't have a bone folder? A dull knife or the edge of a ruler works fine as an alternative. Press firmly along the crease line to properly press the paper. This small detail makes a big difference in the sturdiness of your bag.
Materials overview
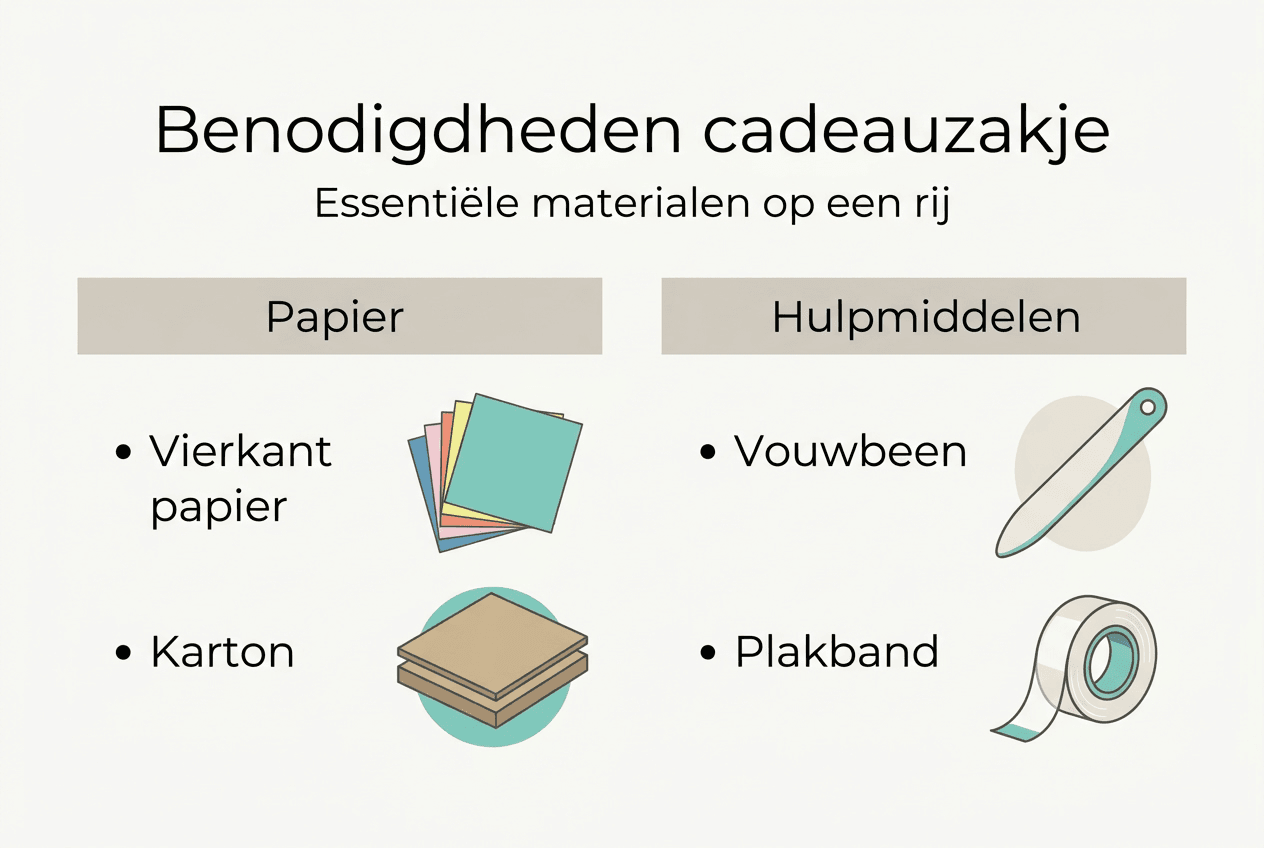
| Material | Function | Alternative |
|---|---|---|
| Square paper | Base for the bag | Rectangular paper, cut to size |
| Template (box/book) | Shape reference | Any sturdy rectangular object |
| Bone folder | Create sharp creases | Dull knife, ruler edge |
| Glue/tape | Secure seams | Double-sided tape |
| Clips | Close top | Clothespins, paperclips |
Pro tip: Start with a test bag using plain printer paper before using precious decorative paper, so you can practice the technique without waste.
For a personal touch, you can make DIY gift bags for presentation with materials that reflect your style. Think of paper with patterns, textures, or even homemade prints.
Step-by-step instructions for folding gift bags
Now that we know the necessary supplies, here's a concrete step-by-step plan for folding the bag. This method is based on a specific origami technique that combines simplicity and aesthetic appeal, perfect for small to medium-sized gifts. Follow these steps carefully for the best result.
-
Prepare paper: Cut your paper into a square if it isn't already square. The size determines the final bag dimensions, so measure your gift beforehand. For a bag of approximately 15x10 cm, you'll need a 30x30 cm square.
-
First basic fold: Place the paper with the decorative side down on a flat surface. Fold the paper precisely in half, bringing the top edge to the bottom edge, and firmly crease the fold with your bone folder. This will be the bottom of your bag.
-
Mark sides: Fold both side edges to the center, so they meet but do not overlap. Firmly crease the folds. This creates the side panels of your bag. Open the paper again after marking these creases.
-
Use template: Place your template (box or book) in the center of the paper. Fold the sides of the paper around the template, so they overlap at the back by about 1 cm. Apply glue or double-sided tape to this overlap and press firmly to secure.
-
Form bottom: Carefully remove the template. Fold the bottom of the bag inwards, first one side and then the other, so they form a flat bottom. Fold the corners inwards for extra stability and glue them down. This gives your bag stability to stand.
-
Finish top: Fold the top edge of the bag outwards by about 2 cm to create a border. This reinforces the opening and provides a neat finish. Firmly crease the fold with your bone folder.
-
Add closure: Fold the top edge over to the front and secure with a small clip, decorative tape, or a sticker. You can also punch small holes and thread a ribbon through for a handle.
“Creating sharp, crisp creases is essential for a bag that maintains its shape and looks professional, especially at the seams and bottom.”
Pro tip: Work on a clean, flat surface and keep your hands dry to prevent stains on the paper, especially with light colors.
You can adapt this basic folding technique by varying the paper size or adding extra decorative elements. For more wrapping techniques, see how to perfectly wrap gift paper for additional tips.
Common mistakes and tips for the perfect gift bag
After learning how to fold, it's important to know which mistakes to avoid for a beautiful result. Even experienced crafters sometimes make simple errors that affect the quality of the bag. By recognizing these pitfalls, you'll significantly improve your results.
A common mistake is
Not using a bone folder is a missed opportunity. Use a bone folder or ruler edge for sharp creases that improve structural integrity and appearance. Folding with just your fingers rarely yields the crisp lines that characterize a professional bag. The extra effort of using a tool directly pays off in quality.
The choice of paper thickness requires balance. Paper that is too thick is difficult to fold and can tear at the creases, while paper that is too thin is not sturdy enough for the weight of the gift. Test different thicknesses to find out what works best for your project. For heavier items, choose cardstock or sturdy wrapping paper; for light gifts, standard paper is sufficient.
Common mistakes and solutions
- Uneven sides: Measure accurately and use a ruler for straight folds
- Weak creases: Always use a bone folder or alternative tool for pressure
- Tearing at creases: Choose thinner paper or fold slower with less force
- Unstable bottom: Reinforce with extra glue or double-fold the corners inward
- Messy appearance: Work on a clean surface and keep folds parallel
The placement of seams affects the appearance. A side seam, where the overlap is on the side of the bag, looks neater than a seam in the middle back. Plan your folding strategy so that the seam is in a less conspicuous spot, especially if you're using decorative paper with a pattern.
“Avoid excessive gluing, as too much glue makes the paper soggy and can bleed through, causing stains on decorative paper.”
Pro tip: Use small pieces of double-sided tape instead of liquid glue for a cleaner result without waiting time or risk of stains.
If your bag doesn't stand up well, check that the bottom is properly folded and reinforce with extra tape on the inside if necessary. A sturdy bottom is crucial for functionality. Learn more about original packaging techniques at 7 tips for original gift packaging stores.
Variations and creative ideas for gift bags
Finally, we inspire you with variations and creative tips to make your bags personal and fitting. The basic bag is just the starting point for endless creative possibilities. By combining different techniques and materials, you can create unique packaging that perfectly suits any occasion.
There are variations in folding techniques for bags with square bottoms and handles that serve different purposes. Flat bags without a bottom are ideal for cards or flat items, while bags with a square bottom stand sturdier and can carry larger gifts. Bags with handles, made by punching holes and threading ribbon through, are practical for carrying heavier items.
Material choice opens up a world of possibilities. The article emphasizes the creative aspect of experimenting with different paper types for personalized bags. Recycled paper such as old cards, magazine pages, or sheet music gives a vintage or artistic look. Glassine or baking paper creates a delicate, translucent look perfect for small jewelry or soaps. Kraft paper offers a rustic, natural aesthetic that pairs well with twine and dried flowers.
Adjusting paper size determines the final bag size. For a small bag of 10x8 cm, start with 25x25 cm paper; for a medium bag of 20x15 cm, use 40x40 cm paper. Experiment with different proportions to find the perfect fit for your gift. Always measure your gift beforehand and add 5 cm to each side for folding room.
Decoration adds personality to your creations. Use satin ribbons to tie the top closed, stickers or washi tape for color accents, stamps with initials or dates for personalization, or dried flowers and twigs for a natural touch. Handwritten labels or tags make each bag extra special and show that you've put in effort.
Comparison of popular folding styles
| Style | Difficulty | Sturdiness | Best use |
|---|---|---|---|
| Flat bag | Easy | Low | Cards, flat items |
| Standard bag | Medium | Medium | General gifts |
| Square bottom | Medium | High | Heavier items, boxes |
| With handles | Difficult | High | Portable gifts |
- Seasonal themes: Use Christmas paper, Easter designs, or birthday patterns
- Color coordination: Match bags with the recipient's interior decor or favorite colors
- Texture variation: Combine smooth and textured paper for visual contrast
- Multifunctional: Make larger bags that are reusable as storage bags
Pro-tip: Keep scraps of pretty paper from other projects in a box specifically for gift bags; this way, you always have material on hand and reduce waste.
For more inspiration on choosing the right bags for different occasions, check out gift bag ultimate guide and discover types of gift bags retailer tips for professional insights.
Discover premium ribbons and accessories for your gift bags
After tips for creativity, these products will help complete your gift packaging. Your self-folded gift bags deserve a finish that is as meticulous as your folding work. Kadopapier.net offers an extensive range of high-quality ribbons and accessories that will elevate your creations.
Accentuate your bags with luxurious ribbons that transform any packaging. The red voile ribbon adds an elegant, translucent texture perfect for festive occasions such as Valentine's Day or anniversaries. For a playful, festive touch, choose curling ribbon Emerald which curls beautifully and adds a vibrant color accent to neutral bags.
Sometimes you want a ready-made option that is still elegant. The fuchsia organza bags offer a luxurious alternative to paper bags, ideal for jewelry or small gifts that deserve extra attention. The translucent material creates a mysterious, elegant presentation.
With these quality materials, you can turn every gift into a special moment. The combination of your handmade bags with professional finishing materials shows that you value both creativity and quality.
Frequently Asked Questions about Folding Gift Bags
How do I choose the best paper for my gift bag?
Choose paper based on the weight of your gift and the desired look. For light items like jewelry or soap, standard wrapping paper or even printer paper will suffice. Heavier gifts require thicker cardstock or sturdy kraft paper that can bear the weight without tearing. Decorative paper with patterns works best for special occasions, while plain paper gives you the freedom to decorate it yourself.
Can I make gift bags without glue?
Absolutely, you can make bags using only folding techniques and double-sided tape or even clips. Origami bags require no glue at all, only precise folds that hold each other in place. Use small clothespins or decorative paper clips to close the top. This method is cleaner and easier to adjust if you make a mistake.
What is the fastest method to fold a gift bag?
The fastest method is the flat bag without a bottom, which can be folded in less than five minutes. Fold a rectangular piece of paper in half, seal the sides, and fold down the top. This technique is ideal for last-minute gifts or when you need to make several bags quickly. For more folding speed, see how to fold tissue paper for additional techniques.
How do I ensure my gift bag is sturdy enough for heavier gifts?
Use thicker paper such as cardstock and reinforce the bottom by folding it double or gluing an extra piece of cardstock inside. Ensure wide seams of at least 2 cm that you secure with strong glue or wide double-sided tape. Consider handles made of sturdy ribbon threaded through punched holes and tied inside, to better distribute the weight.
What variations in gift bags can I make myself?
You can endlessly vary sizes, from mini bags for jewelry to large bags for clothing. Experiment with different bottoms such as flat, square, or folded, add handles made of ribbon or paper, use different closures such as clips, stickers, or ribbons, and combine multiple paper types for a layered effect. Each variation suits different occasions and gift types.